Thursday, June 6, 2013

House Tour - DIY projects

I finally got the apartment looking decent enough to show off. Look through the pics and I'll share tutorials on the various DIY projects later.
My dresser area, sorry the dresser looks a bit cluttered


Breuer chair spray painted black

Coffee filter wreath 


Lots of DIY projects to share here.

Pride and joy! cushion I made

Basket used as side table. Spray painted gold.

I tried adding a glass top to my pallet coffee table but I kinda like it without.

Tuesday, December 11, 2012

DIY Gifting

The holidays are fast approaching and I can't help but feel that they will burn a hole in my pocket. Thank goodness my daughter is still too young to think up a wish list. My solution was to buy one gift and make a second Do-It-Yourself gift. I think it would be an unexpected and endearing surprise for my family, plus it should be fun!

  • From a spa set to DIY bracelets, Desiree shows you 25 cool DIY gifting ideas.
  • Nothing says 'pamper me' like DIY gift baskets. Make a spa set, a personalized monogrammed set, or a decadent treat basket. It'll sure send the message that you put a lot of thought and care in making the gift.


  • This posting wouldn't be complete without linking up with one of my favorite blogs - tipjunkie.com. There's a wealth of ideas and inspiration from this and other affiliated blogs. 

  • Finally, enjoy more eye-candy from Pinterest. I'm sure you'll find inspiration for your own DIY gifts!


Monday, December 10, 2012

Affordable Ways to Update Furiture

I finally got the dresser of my dreams!! It needs work, but the bones are great, and I like the wood finish (sorry about the mess).


I've been thinking about how I would improve the look in my previous posting. Since I like the wood finish so much, I won't cover it with paint, but there are obvious signs of wear and tear especially on the drawers so I will have to cover that up. 
As I am rummaging through various ways to give new life to my dresser, I've come up with a few that I'll share with you:

  1. Decals

Decals are a fun, quick and easy way to give furniture some character. Best of all, when you get bored with them, they come off clean!


2. Stencil

Some of the ways to apply stencil is to spray paint, brush on, roll on or use a dabbing technique with a sponge. The results are quite beautiful. Don't forget to seal the finish.


3. Reverse stencil (using decals)

This is an ingenious way to stencil. Simply place a decal on desired area,, sand the surrounding areas (if necessary). Prime, paint then remove the decal.


4. Changing hardware

This is probably one of the easiest ways of updating furniture and kitchen cabinets. A little change in detail goes a long way in overall appearance. Check out e-how's article.

5. Wallpaper accents

Line the back of cabinets, shelves and bookcases with your favorite wallpaper for that added color and style. 


Like the wallpaper too much? Just cover the whole piece of furniture!

5. Painting

This is a popular way of refinishing furniture. You can either go with a soothing neutral or bring in a pop of color. Good prepping will give you perfect results. Learn how.

6. Gilding

This is when you apply a thin layer of metal to a surface. It can be gold, silver, bronze or any other metal. You better be prepared for a lot of trial and error, plus patience.


7. Decoupage

This is the art of gluing pieces of fabric or paper onto an object. Here is a cool decoupage of a coffee table with atlas pictures. Learn how here.

8. Repurpose

There are tons of ways to repurpose your furniture.
A classic one is turning an old door into a headboard. This slideshow from Martha Stewart shows 14 other ways to repurpose. 


Another slideshow from HGTV.com shows a dozen creative ways to use old furniture, like this Hoosier cupboard that was painted white and turned into a home office desk.


You can also use everyday items and turn them into works of art, like Rebecca has done with her baskets.


She has craftily turned them into an interesting focal point by spray painting them and hanging them on a wall. You can see how she did it here.

I've now narrowed down my options to using stencil, reverse stencil, or paint some details of the dresser. I'll probably also change the drawer pulls.Tell me what you think...

Saturday, December 8, 2012

Thinking about a 50's vibe home

Lately I've been really fancying mid-century modern furniture - a la Mad Men. I find the  simple clean lines refreshing.


I've decided to embark on this unknown territory and collect some furniture for my new place. So far, I've sealed two deals off of Craigslist that I'll be showing you later. They were a steal (6 Breuer dining chairs and a dresser) so I couldn't resist. Of course, I want to put my own stamp on them to introduce them to the 21'st century. Once I fully decide what it'll be, I'll make dedicated posting.
In the mean time, here are some ideas that have been going through my head:


Breuer dining (taken from flickerhivemind.net)... I like the simple round light. I could use a paper lantern.

This dresser looks much like the one I'm getting. I like the floral silhouette

Or a metallic finish stencil


And for an overall look...


It's a little too white, especially with a 3 yr old. 

Maybe...


There's definitely some potential. I've been lusting over the Emily convertible futon that's $189 at Walmart. 


It seems  like an affordable base to start with for my transformation. What do you think?


Friday, December 7, 2012

Safari Chair Revamp

I adore these safari chairs we got from Kenya. Being a native of the country and knowing that they are a rare treasure, I wanted to give these beauties a face lift. The chairs are four but I'll be showing you picture of two.
so here is the before...

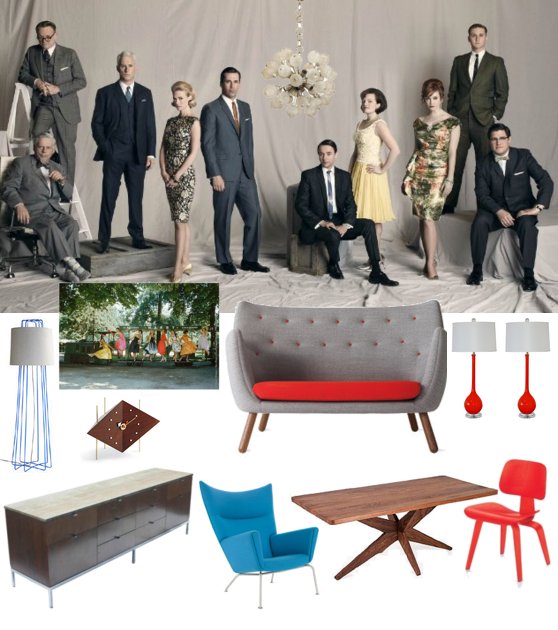
You can see that the finish is really worn and the canvas is faded. But they have potential. I mean just picture a living room with these chairs as occasional seats or dining chairs, and they could be easily folded and stowed away when not needed.


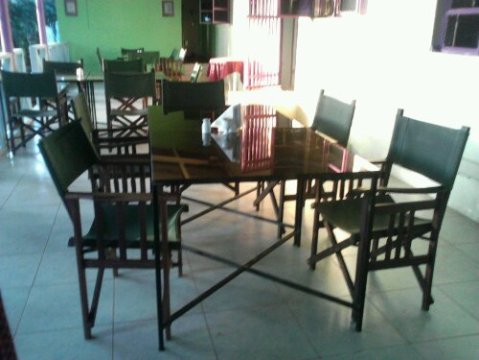
They are be great for both indoor and outdoor seating. This pic was taken by ChocolateHoney's blog from his visit to a restaurant in Tanzania.

I knew the canvas needed to look more presentable so I fixed some holes ad tears with my sewing machine after I stripped them off the chairs (The seat portion was tacked down so I had to pull them out).

I really like the darker wood finish so I sanded down the old finishing on my chairs. This took days, outside the sweltering summer heat as I was living in Georgia at the time. But it was well worth it! 

After all that sanding, I really wanted to get things going; I decided to use a stain with polyurethane in order to do 2 steps at once. I got Minwax at Home Depot - Bombay Mahogany


I used the a good quality brush. This stuff gets thick so be prepared to deal with messes, but it does the job well. I got into all the corners, and it covered even the areas that the sander didn't get.

As I was waiting for the first coat to dry, I machine washed the canvas. They were looking really faded so I used Rit dye in dark brown.

The canvas was a faded dark green so I had no idea how it was gonna come out. It turned out to be a grayish olive color that contrasted beautifully with the new finish.

I did a second coat of the polyurethane. Since it was summer, drying time was pretty fast. A couple of days outside and they were good to go!

So here is the final outcome! 
This is just one of the four chairs, it looks much like the chairs in the restaurant in Tanzania.


..and a closer view of both the wood and canvas tones.

Introduction

Hey you...
So I've been racking my brains over what my first posting should be. This is monumental for me because there's no turning back; I'm entering the world of blogging (applause). So I'm a single mom, a student, an avid DIYer (when  get the chance), and what I hope could pass as a savvy designer. Nuff said, let's get to the meaty matters!

Well, I could start with projects I've bee aching to do, as soon as I finish my undergraduate studies (in 1 week...woohoo). Or I could show you what I've accomplished, just to boost my morale, and inspire you - I hope...
I think the latter approach seems more appropriate so...here we go!